Showing posts with label Nested Ornaments: Bulb. Show all posts

Tuesday, August 21, 2018

Winter cabin in holiday ornament

Hi, Janja here!
New Christmas dies are already in the store. They are currently on sale for 25% off.
Since my dies are still on the way, I have chosen some older ones and made the holiday card.


- CottageCutz dies: Winter Cabin Border, Spruce Stems, Nested Ornaments: Bulb, Oval Set, Nested Scallop Oval Set
- white card base: 5.3 x 5.3" (13,5 x 13,5 cm), folded
- white and brown cardstock
- embossing folder
- double-sided adhesive tape, self-adhesive foam tape, glue
- colored ink pads

Cut out the ornament from a brown cardstock. Then cut out the opening with an oval die in the ornament. Prepare two more ovals. The cuts on the edges are shaded and glued together.


Cut out the winter cabin border. Shorten it with scissors to fit the size of the ornament.
Assemble ornament.


Prepare a white card base. Trim two squares of white and brown cardstock (4.7 x 4.7" and 4.9 x 4.9").
Cut out round openings in the middle of both to match.
Stamp a sentiment. 


Cut out another square from a white cardstock and emboss it. Attach it to the back side with self-adhesive foam tape.
Cut some spruce stems.


Finish the card.


Thanks for stopping by. Have a lovely day.


Friday, October 28, 2016

~From Our House to Yours~

Hello Scrapping Cottage friends! Thanks for taking the time to stop and visit today. It's Mary Marsh here bringing you the Friday edition of the Blog. Can you believe that October is almost a wrap?
The countdown to Christmas is starting. Yikes! I am behind on both Christmas and Thanksgiving cards. Hopefully, I can correct that some this weekend.
 
Today I am showing you a whimsical style card that would be very easy to mass produce. It's featuring the Nested Ornaments: Bulb and some Peachy Keen Face Stamps. 
 
Our design team partnered with Peachy Keen Stamps to celebrate their new release of face stamps that work perfectly with the CottageCutz Christmas ornament dies. Just a little way to bring some whimsy to your holiday crafting. Check out the site because Kathy is offering some promotional pricing on her new stamps + the CottageCutz dies.
 
Let's get started with my card and some details on what I did.
 
Red Card Base: 4 1/4" x 5 1/2"
White Embossed Layer: 4 1/8" x 5 3/8"
 
I decided to use this Cuttlebug winter themed embossing folder as the backdrop for my ornaments. Wanted to create some background interest.
 
My next step was to die cut my ornaments in red cardstock. I used the smallest ornament in the set.  The face stamps come in different sizes and for this ornament I used the 1 1/8" set. I made a guy and a girl ornament to coincide with the sentiment I used.

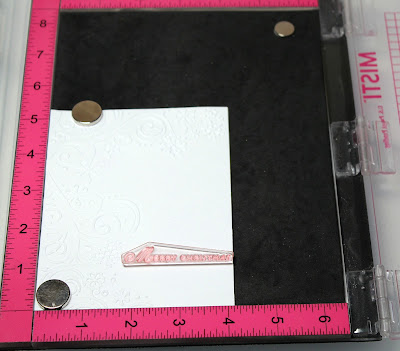
Before I assembled my card I stamped my sentiment. The "from our home to yours" is a one line stamp. I used my MISTI Tool to get the placement I wanted on 2 lines.
Using the MISTI I placed my Merry Christmas stamp on my background panel.
 
 
I lined up the "from our home to yours" stamp and masked off the part of the stamp I didn't want on the 2nd line of my greeting. 
 
2nd line of sentiment stamped
Repeated the same masking process and stamped my 3rd line of sentiment.
Now I am ready for the card assembly. I used some 1/8" striped red ribbon to "hang" my ornaments. Scattered some red sequins and my card is completed. I hope I gave you some additional inspiration for Christmas.
 
Also don't forget about our newest challenge going on right now. The theme is fall. Here is the link for more info.
Until next week..........inky hugs.
 
http://www.scrappingcottage.com/cottagecutznestedornamentsbulbbasics.aspx