Showing posts with label Fancy Lace Border. Show all posts

Friday, April 07, 2017

SWEET BABY CARDS


Hello dear friends !!!!

It's Anita here with another post with beautiful CottageCutz products. Did you see the beautiful baby theme dies that have been launched recently. They will surely win your heart... So cute they are!!!!

I have not yet started working with them , but then I am showing some old dies that are so beautiful that I love creating baby theme projects with them.

Here I have made a boy and girl shaker card using CottageCutz dies.

you can check all the baby themed dies here.


To make these cards, cut a card base 7" x 5". 
Adhere matching baby themed pattern papers. 
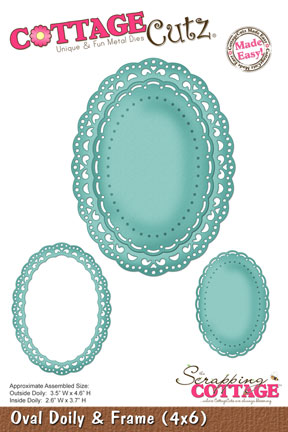
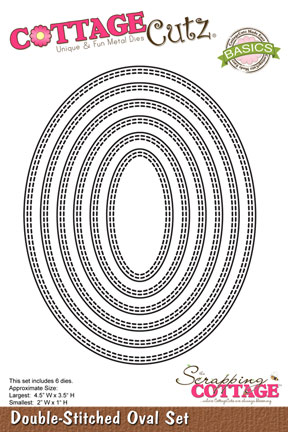
Cut 2 ovals from the stitched oval die. 
Cut 6 frames using stitched oval die. Adhere the three frames together one, for each card.
Adhere the large oval on the card base. Add sequins and add the transparent sheet cut to oval size. 
Adhere the frames forming a shaker card. Die cut all the baby themed pieces and distress accordingly pink and blue for the cards. Adhere on the card as shown. 
Add sentiment.

It is so much fun and easy to create these beautiful cards with CottageCutz dies.
List of Dies Used.


Do visit the CottageCutz blog and the store for amazing products and inspiration. Thanks for spending time here. Have a nice day.


Saturday, July 30, 2016

Shabby Chic Card with Anita Kejriwal

Hello dear friends,

This is Anita here and I hope you are all set to have a wonderful time crafting with me. Today, I am going to share a shabby chic card with you. I have made this card using various CottageCutz dies , the details of which you can find below.
Here is also a video tutorial on making 3D flowers and arranging them on the card.

Here is my card.


To prepare the base of the card, follow these instructions.

1. Cut a white card stock measuring 7.5 inches x 5 inches.
Score at 0.5 inch on the 7.5 inch side and fold. Cut another piece 7 inches x 5 inches and adhere to the folded card.
2.Cut a mat layer out of white card stock measuring 6.75 inches x 4.75 inches and curl the edges. Add texture using modelling paste and script stencil.
3. Cut a pattern paper a little smaller than the second mat layer. Add texture using stencil and modelling paste. Let it dry. Tear in several layers as shown and combine with the CottageCutz dies and add to the card. 


After finishing the base, make the flowers and arrange it on the card. Follow the video tutorial here.


List of dies used


So I hope you liked my card and the tutorial. Please do leave your feedback. We are also having a contest at our blog. So do share your entries here

See you next week.


Saturday, May 23, 2015

Paper gift pencils holder

Hello Everyone!!!


  Today I am sharing with you my new project I created with beautiful NEW  Victorian Collection of dies.

This is the perfect gift for teachers, students or kids.
Very simple project! 
Just make a background using patterned paper and CottageCutz borders. Then,  wrapped all pencils with this and glued Fancy Victorian butterfly on top of wrapper. Decorated butterfly with rhinestones. 


 For this project I used:


Wednesday, July 23, 2014

Welcome, BABY card

Today I am sharing with you my new second Welcome, baby  card I created with beautiful CottageCutz Baby Collections of dies. 
So adorable image for Baby cards and Baby projects.

For this card I used so cute "Baby Elephant" die.


I cut all pieces of Elephant three times. Then, sponge the edges and glued all parts together in a cute image. Next, I created cloudy background using clouds template, sponge and blue ink.


I, also, added cute "Lace border" from CottageCutz. Oh, also, I stamped sentiment and added ribbon with cute button.
So cute baby card. Love it :-)))))

For this project I used:


Have a Wonderful Day!
 Olena

Thursday, May 22, 2014

Happy Anniversary Easel Card


Happy Thursday everyone!

Kathy with you today with an easel card I made using the Swans Die from the CottageCutz Wedding Release, along with the Starburst FlowerHappyAnniversaryFancy Lace Border and Greenery Dies.

It's hard to show just one picture of an easel card, so I have a bunch for you!  Here's a view from the front.


Here are views from the side.


Here's the inside.


And finally, a close up of the front.


To make my card, I used cream card stock to create a 4 1/2" x 4 1/2" easel card.  (If you're not familiar with easel cards, there is a tutorial on Split Coast Stampers here that you can refer to as a guide.)  I added a black mat to part of the front that is embossed with a polka dot embossing folder and popped it on the base.  I cut the Fancy Lace Border Die twice, once with black and again with LeCreme Designer Paper and added them to the bottom of the mat.  The Swans Die was cut with the cream and added with pop dots. The 2 small flowers from the Starburst Flower Die with also cut with LeCreme DP and added the the Swan.  Two leaves were added to either side of the flowers cut from the Greenery Die using black card stock.

For the inside of the card, I cut the sentiments using black card stock and added them by running them through my Xyron Create-a-sticker Machine.  I then added a piece of black trim and one of the Greenery Dies cut using black card stock.

To finish my card, I added a bow made with Cream Seam Binding and a couple of black pearls.

These are the dies I used on my card.