Sunday, October 16, 2016

Happy Halloween

Hello everyone,

It's Donna here sharing another one of the newest Fall CottageCutz dies that was released in August. If you missed it, you can find the collection of Fall dies here. I am using the Haunted Castle that has so many possibilities. If you have not looked through the blog, please do there are so many wonderful projects by the talented design team.

 Here is my card:


Closer look from the side. I used pop dots to give the house some dimension. I also cut the ghost out in white so they would stand out. I cut yellow paper so the house looks like there is light inside the house.

Closer look of the ghost and the house. 

How I created my card:

1. A2 size card 4 1/4 x 5 1/2,

2. I cut all my pieces out,

3. Also used water color paint to make my background on water color paper,

4. I cut the water color paper down to 4 3/4 x 3 3/4,

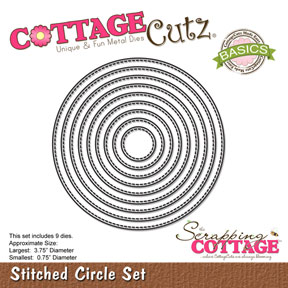
5. I die cut the largest Stitched Wide Rectangle Frame, and adhered it to the water color paper,

6. I cut a 1/2 inch stripe of paper and a thin piece of orange paper and adhered it to the back of the Rectangle Frame,

7. I added the haunted house and the sentiment to the water color paper,

8. I added the frame to the base of the card.

9. I finished the card off by adding some clear sentiments.

Thanks again for stopping by, please stop over at the Scrappin Cottage blog to see all the beautiful designs from the other design team members. Don't forget about our newest challenge that is running right now. The theme is holiday and here is a link for more information.

CottageCutz Dies used:


Saturday, October 15, 2016

SHAKER CARD IN NON TRADITIONAL CHRISTMAS COLOUR

HELLO !!!

It's Anita here !!! Have you started making your Christmas  cards ? The CottageCutz store has a wide range of Christmas and Fall theme dies and you can create simple and also heavy layered cards using these. You can check them out here:
Christmas 1, Christmas 2 and Fall Theme
Today I have a new card for you with Christmas theme but there is a twist in it. Its a shaker card and it's in non-traditional Christmas colour.
Do check it out here.


To make this card---

Cut out die cuts in white card stock from CottageCutz Stitched Circle die.
Cut out one from the largest die and this will form the base.
Stick together the largest and the smallest die with a 1/4 inch gap and cut out 6-7 circle frames.
Use the CottageCutz Snowman with lamp post to create a scene with a 3d effect. Layer two die cuts with 3D foam tape and distress the top one with scattered straw distress ink.


Adhere the frames in between each layer. I have used 4 frames . Add sequins and cover the top with OHP sheet cut to the same size as the circle. Put the final circle frame on top   and add another stitched frame. Place the whole thing on a brown Christmas Nested Ball Ornament. Add a string.


Apply distress ink Fossilized Amber, Rusty Hinge and Spiced marmalade on a craft mat, spray water and swipe a 7"/5" card stock to colour. Dry with a heat gun.


Cut two CottageCutz Snowflake doily and colour it with Evergreen Bough Distress ink. Apply clear adhesive and sprinkle Rangers Clear Rock Candy Glitter.


Create a circle label with CottageCutz Stitched circle die and add a sentiment.
Arrange all the elements as shown.


Matte on teal coloured card stock and finally adhere to a white card stock.
The finished card measures 7.5" by 5.5"


A challenge is up on the blog. the theme is Fall. We have an amazing collection of Autumn themed dies. So do share your entries. See you next week.


.


Friday, October 14, 2016

Autumn Seasonal Tree

Hello Scrapping Cottage friends! Thanks for taking the time to stop and visit today. It's Mary Marsh here bringing you the Friday edition of the Blog. The fall season is about 3 weeks old now and tonight may be the first frost of the season here in Pittsburgh. If that happens it's the end of our flowers and tomatoes.

But, we still have the beautiful fall leaves to enjoy, and they have not reached their peak beauty yet. Here in this area anyway. So I thought  I would go with a fall card for today's post. I used this super cute seasonal tree die to create it. Let's get started with some details on my card for today.

Rust Card Base: 4 1/4" x 5 1/2"
Chocolate Layering Panel: 4 1/8" x 5 3/8"
Patterned Paper Panel: 3 7/8" x 5 1/8"
Tilted panels: 2 7/8" x 2 1/2"

I used this week's sketch from Splitcoaststampers for my layout. It's a basic sketch but I liked the tilted panels. I added a couple of extra layers to the sketch just for some additional interest.
Once I decided to use this layout, I went looking through my stash for some autumn themed patterned paper. I found this paper and matched it up with the corresponding cardstock and ribbon. I used the ribbon for layer #2 in the sketch.
I used the chocolate and rust cardstock for my tree and mustard & sage for the tree leaves. That picked up the background colors of my patterned paper. I also cut a couple of pumpkins from the Harvest Scarecrow die. Layered the tree and pumpkins on some white cardstock. To ground the images, I sponged some olive ink.
To complete my card, I stamped a sentiment in chocolate ink. I hope I have given you some ideas for this cute new die. I think it makes a great card for Thanksgiving or a Fall theme.
 
Also, don't forget about our current challenge #7 for October. The theme this month is Fall. This new die would work great for the challenge.
Well, Blogger friends that's it for me for this week. So until next time.........inky hugs.
 
http://www.scrappingcottage.com/cottagecutzseasonaltree.aspx
http://www.scrappingcottage.com/cottagecutzharvestscarecrow.aspx


Thursday, October 13, 2016

Holiday Car


Hi, Vladka is here!

Today I have another Christmas card for you with this very cute Holiday car. Let me show you how I created this card.

Basics:

White card base: 5 1/2 x 5 1/2 inches (cut 5 1/2 x 11 inches, fold in half)
Additional piece of kraft cardstock and some white and red cardstock to cut out the die cuts

Other Supplies:

CottageCutz Dies: Listed Below
Distress Ink: Aged Mahogany, Peeled Paint, Twisted Citron, Picked raspberry
Other: Scissors, Paper trimmer, Sizzix machine, Scor-buddy, White watercolor in tube, paint brush


1. With the Holiday Car die cut the car out of red cardstock and all other pieces out of white cardstock. Distress the adges of the car with Aged Mahogany distress ink and color Christmas tree, and gifts with distress inks and all other small pieces with grey, black and yellow copics or with distress inks.


2. Prepare white card base and piece of kraft cardstock which is slightly smaller as cardbase. Prepare also piece of white cardstock and cut out the snow hill out of it. Cut the Merry Christmas ribbon out of white cardstock and cut off the bow.


3. Mix small amount of white watercolor or acrylic paint with water and flick some droplets of the mixture on craft piece of paper. Let it dry.


4. Glue all car pieces together. Now glue kraft paper, snow hill, car and expression on card base as shown on the photo and card is finished.


This is is for today. Have a nice day. And don't forget, seventh CottageCutz challenge is waiting for you. This time theme is FALL. You can linked your project here. And please, use only Scrapping Cottage dies.

Tuesday, October 11, 2016

Halloween

Hi, Janja here!

Halloween marks the last night of October. Since this spooky night is almost around the corner, I decided to do a Halloween card. During the autumn release of CottageCutz dies, I chose the werewolf die.


For the card we need:
- white card base: 4.3 x 5.5" (11 x 14 cm), folded
- white cardstock: 3.9 x 5.2" (10 x 13,2 cm)
- black cardstock
- Distress ink: Stormy Sky, Black Soot
- white color
- masking paper

From masking paper cut out mists with scissors and with the 4th die from the circle set, cut out a circle. Paste them on a white cardstock.


Coat the entire surface with a roller and Distress ink Stormy Sky. After work remove the masking paper. With a white color and a brush repair mists on places where the color went to masking paper. At the end shadow edges with Distress ink Black Soot, stamp bare trees and a flock of birds.
Cut out the werewolf from black cardstock and four spruces with the snowy tree die.


On ready background fasten cutouts.


And a bookmark with a witchy ghost.


Prepare cutouts from color cardstocks with the dies: witchy ghost, spiderweb and witch brooms & hat.


With the die fancy bookmark cut out only the upper part, the rest cut out with scissors.
 

Attach cutouts to the bookmark, insert a string and add wooden beads. 
Cheerful reading.


And don't forget on our challenge #7 - fall
You have time to share your projects with us till the end of the month. 

Enjoy and have fun.