Showing posts with label Nested Stitched Eyelet Circle Set. Show all posts

Sunday, June 09, 2019

Unicorn With Flowers

Hi!

It's Anja here. I have another quick project for you today. I made a magical scene, using an unicorn and decorating it with flowers.


For this card I used:
- Cottage Cutz dies (Unicorn Floral, Nested Stitched Eyelet Circle Set),
- Distress Inks (Mustard Seed, Spun Sugar, Worn Lipstick, Dusty Concord, Twisted Citron, Peeled Paint, Mowed Lawn, Pumice Stone, Broken China),
- white card base (21x10 cm),
- white card stock for die cuts,
- patterned paper (20,5x9,5 cm),
- liquid drops (pink, yellow),
- adhesive foam pads,
- paper glue.

First I cut and colored the unicorn and all the flowers and greenery.


Next I cut all the pieces for the background.


And when I had everything cut and colored I glued all the pieces to the card base. In the end  used liquid drops to add a bit of dimension to the flowers.


And my card was done.


This is all from me for today. Don't forget to stop by at the store for the new release.

See you again next week.

Anja Z.


Cottage Cutz dies I used for this card:


Wednesday, May 01, 2019

Princess Card

Hello!  This is Sukie and today I'm back for my design team post.  I'm sharing a princess card created with the new Magical Fantasy die release.  The die sets used on my card are sure to bring out the inner princess in all of us.
The floral paper was the inspiration for the hot pink colors on my card.  I also incorporated some vellum on my card base.
I used the Princess Dress Up, Princess Accessories 1 and the Little Princess & Roses dies to cut out all of my pieces using card stock. The circle is from the Nested Stitched Eyelet Circle Set.  The die cuts were inked on the edges for extra dimension.  A black gel pen was used to add some eyelashes to my princess and a bit of chalk was brushed on her cheeks.
I created my A2 sized card base and adhered vellum to the bottom portion.  The vellum toned down the patterned background so the "princess" sentiment and roses would pop on my card.
The sweet princess and her purse were adhered to the die cut circle. All of the pink really stands out against the basic white circle background.
The circle was centered on the top portion of my card. This card is perfect for any little girl who is a princess!  
Here are the dies I used on my card available here:


Sunday, August 13, 2017

Wedding Accordion

Hi!

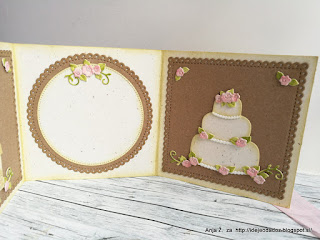
It's Anja here. Today I'm continuing the wedding theme. This time I made an accordion card in which you can write your good wishes for the bride and groom. But I could also be used as a wedding invitation. I think the chapel and the cake would be perfect to use with ceremony and reception information. 


For this card I used:
- Distress Inks (Antique Linen, Spun Sugar, Shabby Shutters, Peeled Paint),
- craft card stock (light and dark),
- ribbon,
- paper glue,
- double sided adhesive tape. 

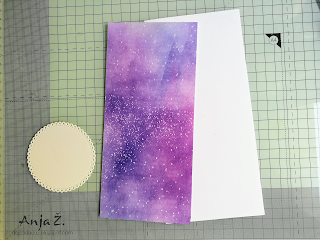
I started with cutting the paper. I cut 30x10 cm piece from light craft paper. I scored it at 10 and 20 cm. I put some Distress ink around the edges. 


Then I adhere the ribbon the way it's shown on pictures below. 


When I had the card base I die cut all the other pieces, colored them with Distress inks and adhere them together. 


And this is the result.


Thank you for stopping by and see you again soon. 

Have a great Sunday.
Anja Z.


Cottage Cutz used in this project: